Floor Plans
The process of building a timber frame home begins with a plan, whether you choose a pre-prepared design or have one custom made for you. While we do offer custom design services, Cabin Creek also provides a series of plans that have already been drawn up. A pre-prepared plan can offer you an affordable design and help you visualize exactly the shape of your new home.
Under 2000 Square Feet
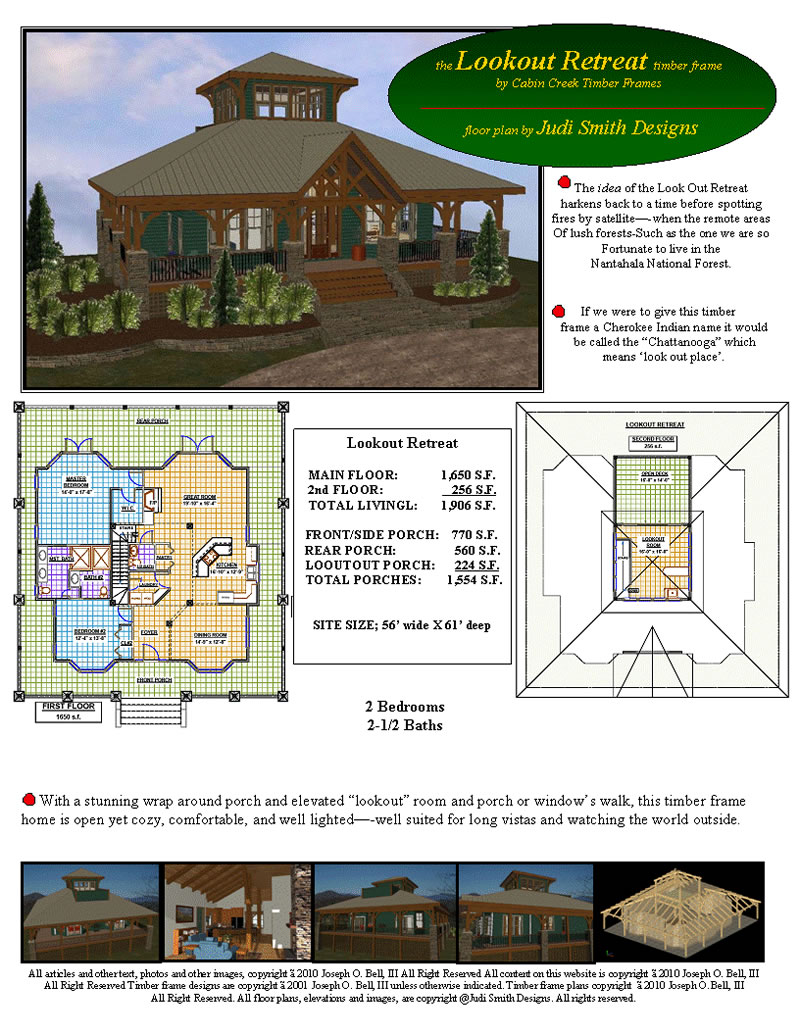
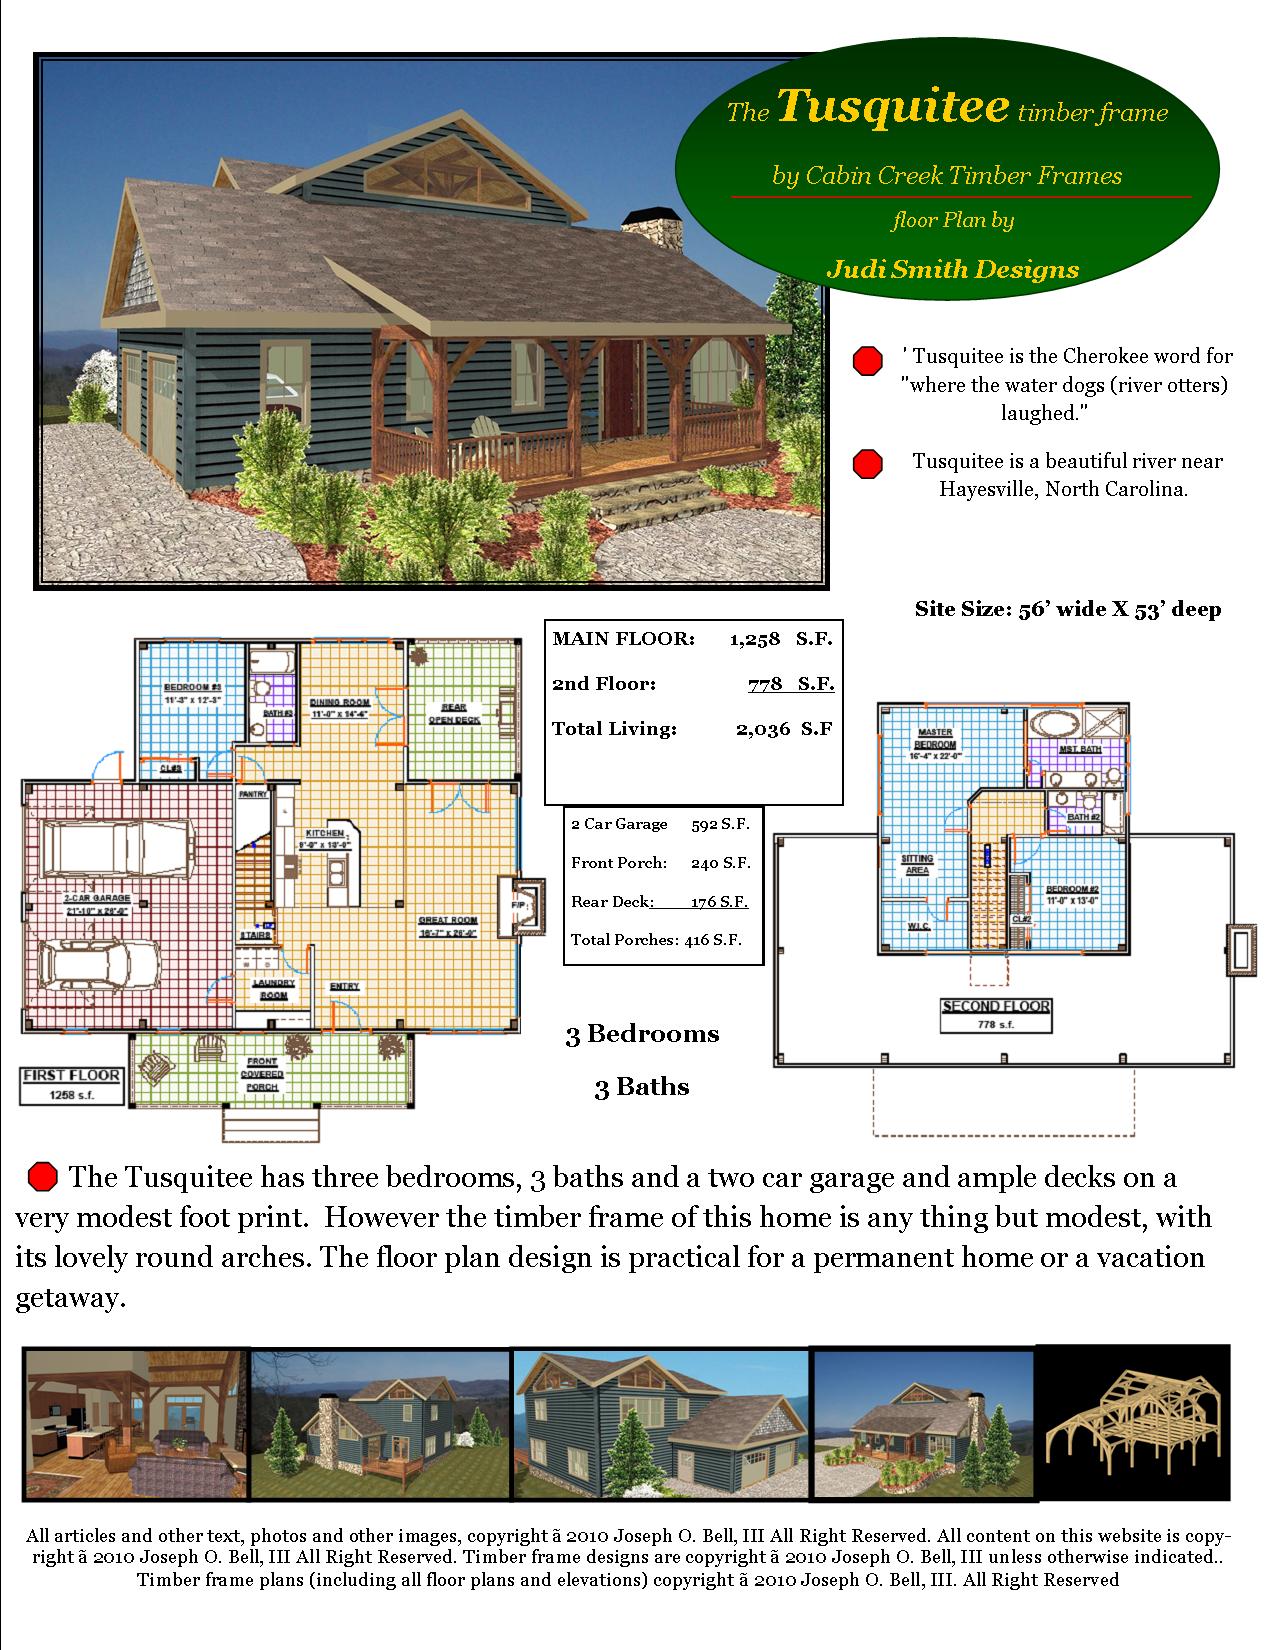
These plans for homes under 2,000 square feet can offer you a wonderful getaway retreat, vacation home, or permanent home, all with a small footprint. Click an image to view the floor plan and read about the design’s features.


Over 2000 Square Feet
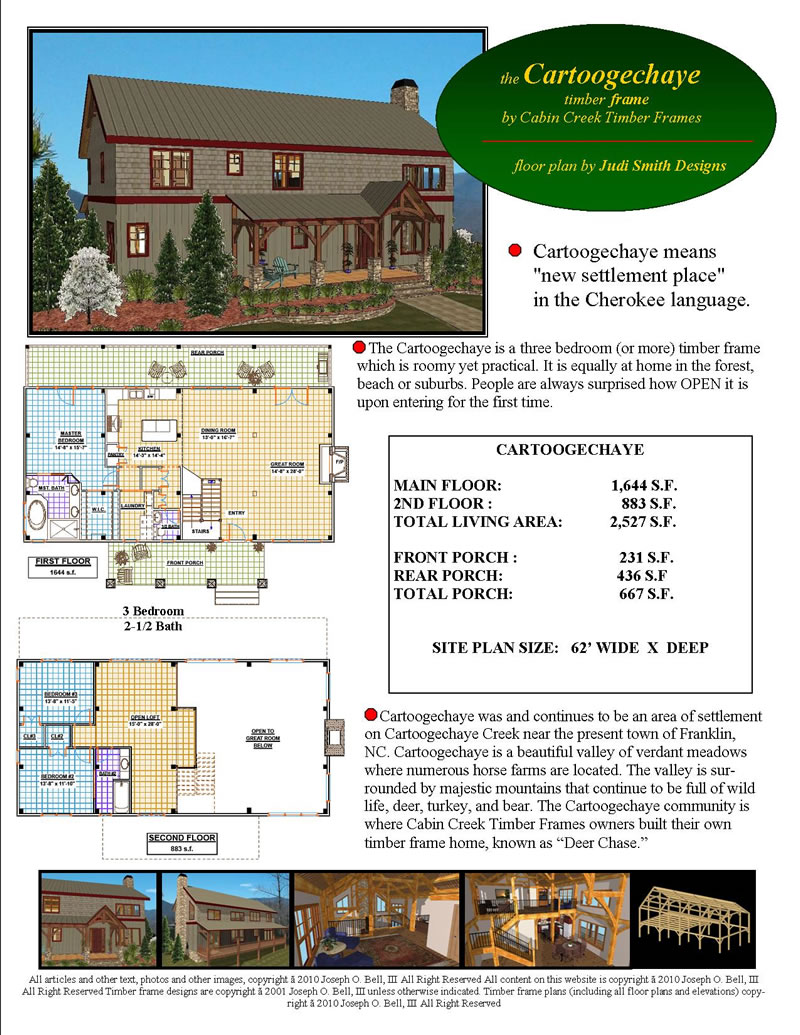
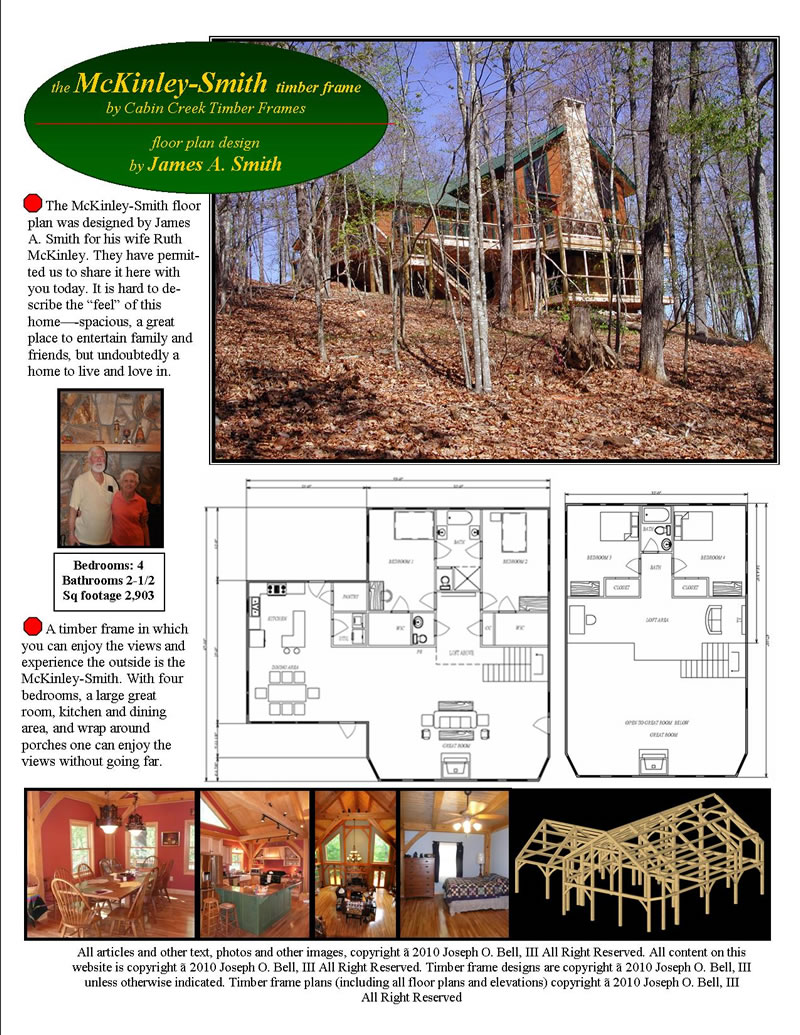
These plans for homes over 2,000 square feet all feature sweeping open spaces and plenty of room for everyone to enjoy. Click an image to view the floor plan and read about the design’s features.


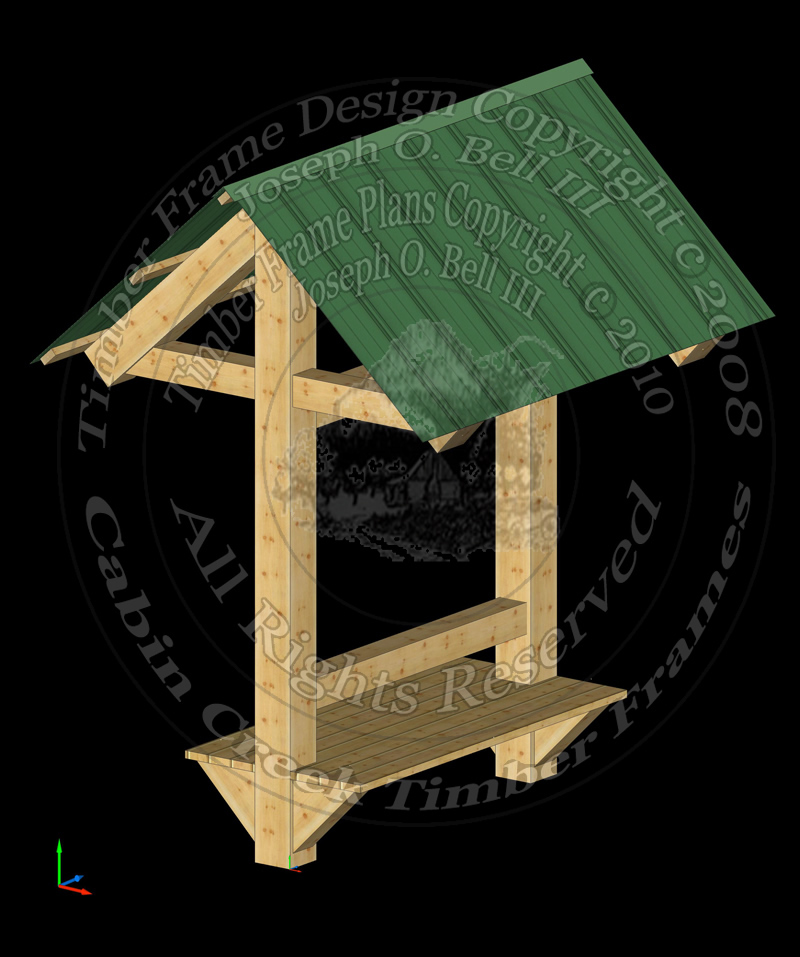
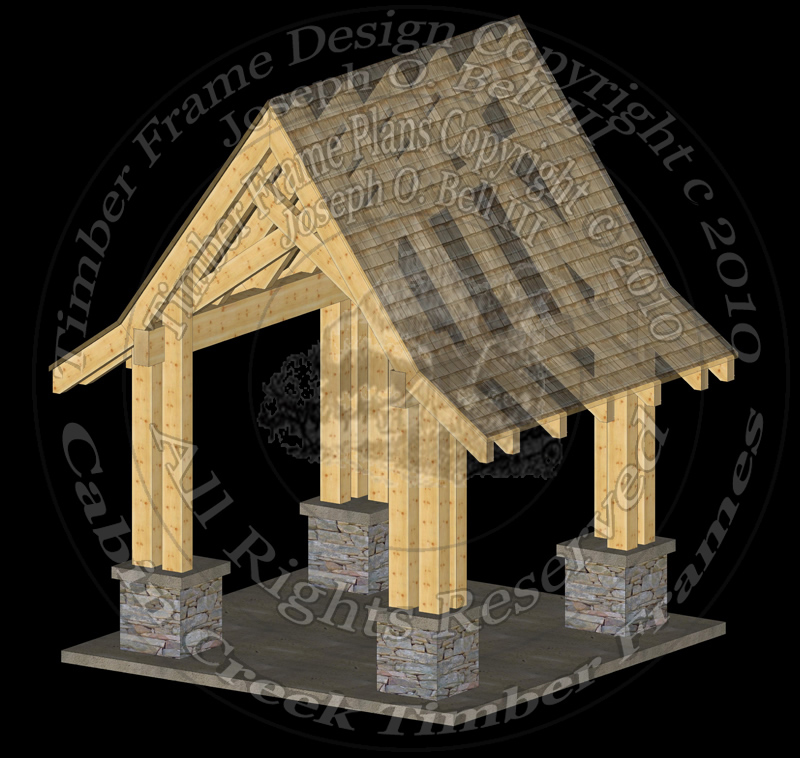
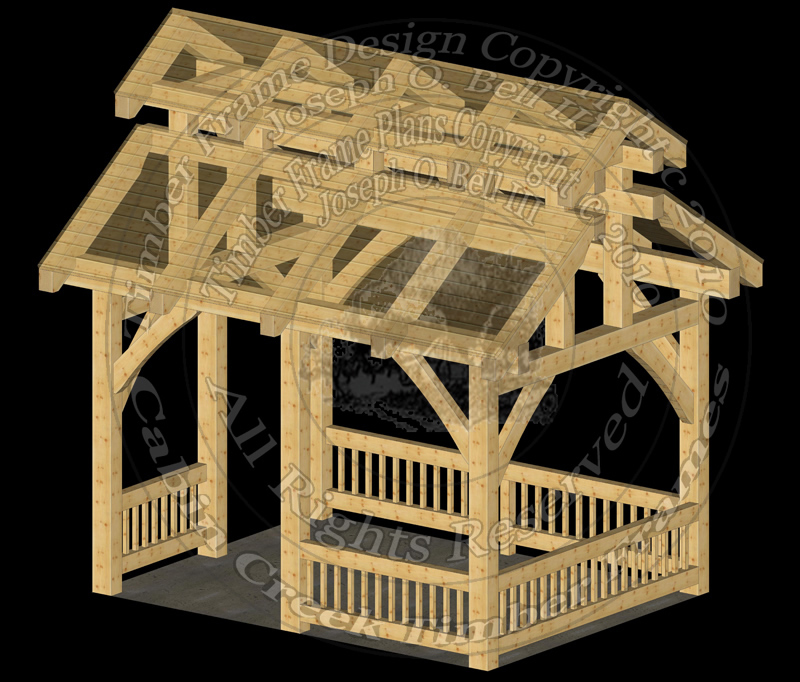
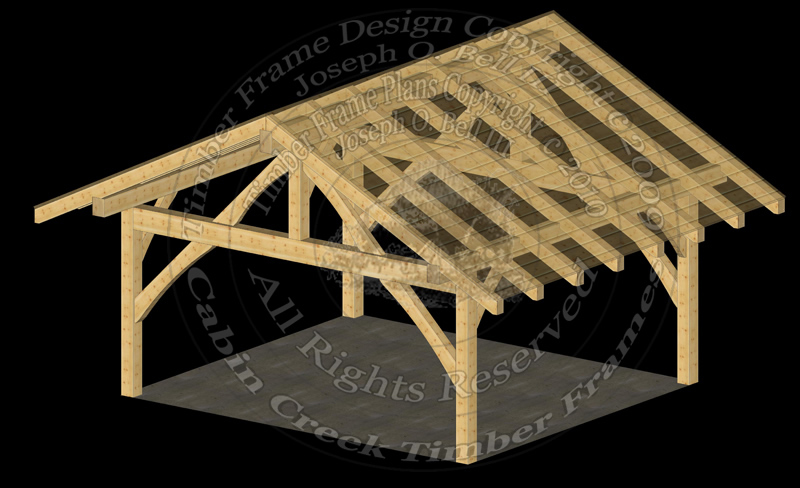
Smaller Timber Frame Structures


Project Planning Guide
 With over 22 years spent building custom timber frames, the Cabin Creek team has learned a few things about how to help families build their ideal structure. The Project Planning Guide was born out of our desire to share this process and offer you concrete ways to focus your thinking about the best design for you. You’re welcome to review the content here and reach out to us at any point with questions.
It’s possible that you’ve been dreaming about building a timber frame home for years before you decided to get started. The truth is that dreaming is the easy part. Project planning for a timber frame does take some work. Fortunately, the more research and planning you do ahead of time, the easier it is to build in the long run.
To get started, consider the following questions and take the time to find answers for them. Working through these questions will help you get a realistic sense of where to start on your project. You can also reference the other sections of the Project Planning Guide to help you consider a range of plan elements, including budget and design tips listed by room type.
- Do I know where I want to build my timber frame home?
- What is my realistic budget for land?
- What qualities does the property have that may affect how we build? Is the land flat, sloping, or steep? Where should the entrance of the house be?
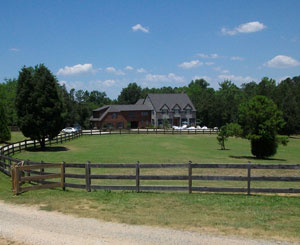
- What are the features of the property that I want to emphasize? For example, can I take advantage of a stream, lake site, waterfall, distant view, sunny garden space, unusual plant, specimen of trees, boulder or rock formation? Does the view during a particular season affect my choice?
- How does the weather affect the property?
- Are there heavy snow loads?
- How much rain will there be? Do I need to have an erosion plan? Does extra money need to be spent to manage the run off?
- Are temperature extremes involved, for example if building in the snow-belt or sun-belt? Would the R-value of the SIPs need to be adjusted from the norm?
- Are there deciduous trees that can be used to shade the home in summer to decrease heat gain and allow heat gain in the winter?
- How will the property and building interact with the local building department and utility services?
- How will I get electricity to the building site? Is there electric service nearby or is the property miles from the nearest power pole? Will I need to pay for power to be run to the site or will I use solar power or a generator?
- Will the property pass a perculation test? A perc test indicates the soil’s ability to absorb liquid over a specified period of time. How long it takes the soil to absorb liquids will be a deciding factor in how large and what type septic system is required. If the property does not pass a perc test, it may not be possible to build on the land.
- Is a hook up to the local sewer system available?
- Is a source of potable water available? Is a hook up to the local water system available? In rural areas, obtaining potable water usually means drilling a well. Find out how deep and how much well costs usually run in the area.
- How will the building site be accessed? Does it already have a driveway with plenty of parking for construction? A timber frame requires at least room for a crane and an area from which to stage the timber frame materials. Is the area above and near where the crane will be working free of overhanging branches, power lines, etc.? Crane operators charge for the service of clearing branches from the space.
- How far away is the property from the fire department? This may impact the cost of insurance after construction.
Does any member of the household need to be near to a hospital, dialysis center, or other special facility?
 Just like building any custom structure, it is important to give the budget for your timber frame project some careful thought in advance. Preparing the budget will help set the parameters for your design, in addition to helping you through the financing process if you plan to borrow money.
What to Include in a Budget
Your budget should include the cost of the timber frame plus the full range of amenities needed for your completed project. Timber frame homes in our area can cost from $200 to $400 per square foot depending on the appointed options.
Elements to consider as you get started on your budget include:
- Timber frame
- Land
- Well
- Septic system
- Grading or roadwork on the property
- Lighting
- Home appliances
- Cabinetry and countertops
- Financing
Establishing a realistic budget will make the process of acquiring financing through a bank or mortgage company much smoother. We recommend that you always talk to several lenders about the terms on construction loans to compare benefits. For example, lenders in our area often use borrower-qualification ratios to determine how much they will be willing to loan you for your project. Our local banks may qualify you on a percentage of your monthly income or a percentage of your debt load. As a result, the amount you can borrow will vary widely between lenders, and it is wise for you to do your research before committing to a lender.
Once you get started talking to a lender, you can use an online interest calculator to help you understand the cost of the project over the long haul. To use the calculator, make sure you have information from the lender available, including the interest rate quoted, the term of the loan in years, and the total amount of the loan.
 Each timber frame is as unique as the individuals who select its design, and the Cabin Creek team is skilled and ready to guide you through the process of planning the structural details for your project. A timber frame can be customized to meet a variety of needs, including cost, appearance, and construction type.
Style of Timber Frame
At its heart, timber framing is about the use of large timbers to frame a structure instead of smaller dimensional (1-2” thick) lumber. However, making the choice to use timber is just the start of the design process because many styles of timber framing have evolved over time. Each style can result in a range of costs based on the complexity of the design. Below are descriptions of some of the styles and terminology.
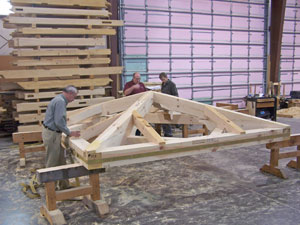
- Mortise and Tenon Joinery. This is the time-tested basis of timber framing joinery. A hole or mortise (perhaps 2”wide x 6” long x 4”deep) is cut into a timber, and a matching tongue or tenon is placed in the hole and pegged with a wooden nail or peg.
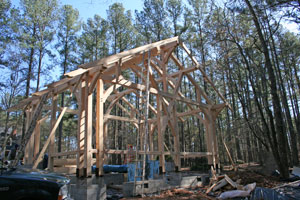
- Bent Construction. Bents are 2 dimensional (2D) arrays of timbers usually joined with mortise and tenon joints. They can be described as a truss with legs. Multiple bents add to the length of a building. Bents are usually connected to each other with ridge timbers, purlins (horizontal timbers joining two principal rafters), and plates (horizontal timbers at the eaves or springpoints) to form a 3D structure.
- Post and Plate. A 3D structure with repeating common rafters usually supported at the upper 1/3 of the rafter by a long longitudinal plate.
- Post and Beam. In most of the US except New England, this is a timber frame made by butting timbers together and connecting them with metal plates and bolts.
- Compound Joinery. This is a more complicated joint due to unusual angles created by a roof plane meeting another roof plane in a perpendicular or oblique angle as would be seen where a main roof intersects another roof and forms a hip or valley.
If you are interested in seeing different styles of timber framing, visit us. We can show you examples of each of the methods described above in our office and model home.
Species of Timber
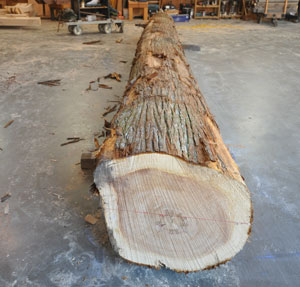 The other crucial factor in the structural design of your timber frame is the choice of wood. Throughout the years, Cabin Creek Timber frames has worked with a broad range of species such as Douglas Fir, Eastern white pine, cypress, white oak, Southern yellow pine, Western red cedar, and Canadian hemlock. The species of wood you select will have a significant impact on the cost, aesthetic, and structural properties of the frame, and Cabin Creek can work with you to help make the optimal choice.
The majority of our timber frames are cut of Eastern white pine. This species of wood is readily available in our area (lower shipping cost), and our experience shows that it is less expensive and more stable than most other species, showing less shrinkage, checking, and twisting over time. It can vary in color from bright white to cream when freshly cut, growing into a golden honey color within a few years.
We are sometimes asked if timber should be dried prior to building the timber frame. While Cabin Creek Timber Frames can arrange for timbers to be dried, we do not believe it is necessary to the process of building a timber frame. Unless there is a specific reason for the extra strength of dried timber, it is usually a waste of money to have timbers dried. To control costs and achieve excellent performance, it makes more sense to design the frame to carry the loads adequately when green. As timbers dry, there is always some checking and shrinking, but the timbers grow 25% stronger as they dry and shrink 4-8% across the grain. With timber framing, this shrinkage is not important, since we depend mostly on the length of timbers. Shrinkage lengthwiseis 0.1% to 0.2%, which is negligible.
The story behind radio frequency drying of timbers starts with some history. Timber frames have been built for some 2000 years, and many of these buildings are still in use after centuries. In each of these buildings, green timbers were used and allowed to dry slowly in place, held by their neighboring timbers, with minimal checking and damage to the timbers. About 100 years ago, after western forests began being logged and lumber from them shipped east, kilns started being used to dry dimensional lumber ( 3” and less) so that rail car loads weighed much less and the locomotives could handle more lumber. Attempts to dry large timbers (5” or more) did not work well then and still do not work well.
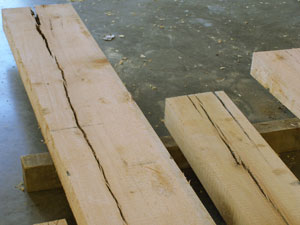 Checking occurs more rapidly and pervasively. It is possible to dry the outer 1½” but the inner sections stay green or wet. Air drying usually requires about one year per inch of depth, but most people do not want to wait 6-8 years for this. Recently, radio frequency kilns (or microwave ovens) have been used to dry timbers to the center of the timber. Checking is a problem with RF kilns as well. There are very few facilities in North America (maybe 2or 3) which can do this, and they add considerably to the cost of the wood—the cost of drying and shipping. Planing is usually done last to insure perpendicular sides, which may require even more shipping costs.
It just plain makes more sense to design the frame to handle the weight loads while the timbers are green and let them be held in place by their neighbors as they slowly dry and become 25% stronger.
 Use this friendly brainstorming guide to help you start the process of home planning. We’ve gathered these ideas over the years while helping prospective homeowners build their dream homes, and we believe they can help you to focus your thinking and find out what is most important to you. Making some early decisions about priority will go a long way to helping you decide on the final design and style for your project.
What are your timber frame design needs?
As you get started imagining the type of home you want to build, it is important to make some decisions about what your family needs, both now and in the long run. You’ll want a functional floor plan that can be enjoyed for many years while supporting all of your activities. To help you narrow down what you need, Cabin Creek has put together a series of lists to help you engage with the planning process and answer the question, What are my design needs? This process can help you regardless of whether you plan to design the structure yourself or engage the help of an architect or designer. We’ve included a template list for each of the lists discussed below to help get you started. If you are a couple or a family, we recommend that you have each member of the family start with their own list and merge the lists together at the end. Take the time to work through the details.
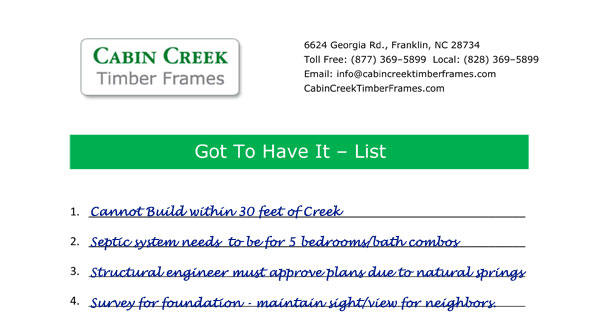
“Got To Have It” List
Begin by putting together the building approval requirements for your project in a “Got to Have It” List. Include all of the requirements and restrictions needed to build for the code, covenant or development standards in your area. This is the best place to start because the items here are absolutely necessary, and they serve as the foundation for all of your brainstorming. For example, this list could include requirements such as:
- The minimum and maximum square footage allowed for your development
- The maximum height allowed for your development
- Septic system requirements
- Set backs
- Earth disturbance guidelines
- Restrictions for placement based on landmarks, such as a creek or stream
View an example list below to help you get started.
Click here to view and print this form for your use.
“The Way We Were” List
After you establish the basic requirements for your structure, start “The Way We Were” list and dig into your memories. Write down examples of places you have loved or enjoyed over the years, and don’t be shy about including things that you disliked about past living spaces. Remembering what you have disliked about past homes can prevent you from repeating mistakes. The goal is to help connect you with experiences that impacted you both positively and negatively over the years to help you draw inspiration. View an example list below to help you get started.
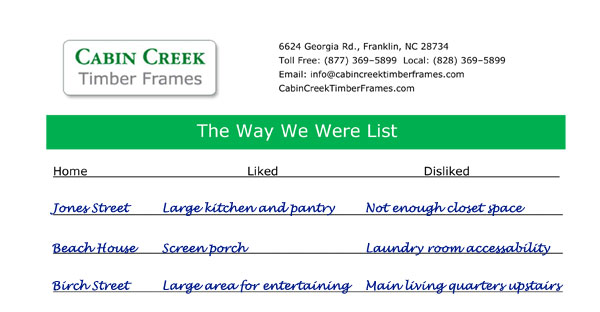
Click here to view and print this form for your use.
“Reach for the Sky” List
At this point, you are ready to do some thinking based purely on your wants, not your needs. Use the “Reach for the Sky” List to capture a note about all the features you would enjoy, regardless of whether they are practical or not. Taking the opportunity to record your thoughts means that you’ll be thinking about them and might be able to find ways to work them into your final design. For example, when the owners of Cabin Creek Timber Frames decided to build their own timber frame home, they had an enormous book collection. The architect understood that storing the books was important to the Bells and suggested lining a few loft walls with shelving for the books. Now in the completed structure, the book shelves serve as a feature to the room while also offering functional storage. View an example list below to help you get started.
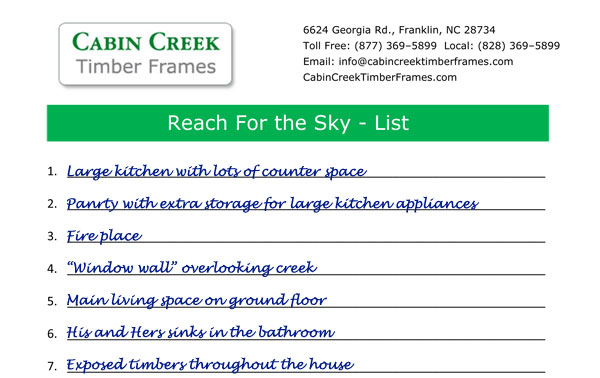
Click here to view and print this form for your use.
“How Are We Doing Now?” List
The “How Are We Doing Now?” List is about taking stock of your current living situation and making thoughtful assessments about how you use your space. Go room by room and measure the space, then write comments about each room. Is it too big? Too small? Not used? It sounds like a simple thing to do, but it works. You’re giving yourself direction on exactly where to go from here based on your own needs. View an example list below to help you get started.
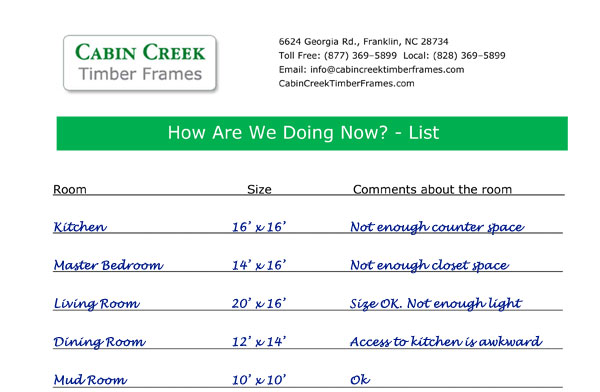
Click here to view and print this form for your use.
What next?
With your lists in hand, you’re ready to start working on the design of your house. Use them as a guide if you work out your own design, or take them with you on conversations with your architect or designer to help express your needs.
Tips on this page are organized into sections. Scroll down to view all sections or click one of the links below to skip ahead.
Unique Timber Frame Design Elements
Building with a timber frame not only gives you a stronger structural frame than building with stud walls or stick built frames, but it also opens many new design possibilities. Read on to learn more:
- There are no load-bearing walls in timber frame structures. This means that you can change the floor plan, even years later, with no structural consequences.
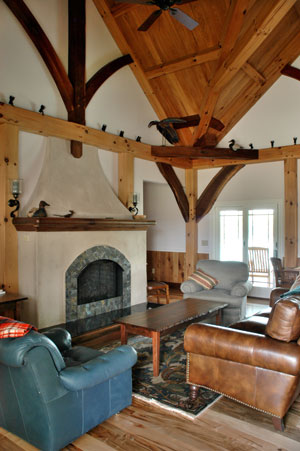
- The working structure of the timber frame is array is beautiful and can be seen from the interior, studied, and enjoyed.
- Timber frame structures can feature as many doors and windows as desired because they can easily be fit between the timbers. This means that there is plenty of space for large windows and access to natural light.
- A timber frame sealed with SIPs conserves energy efficiently and provides effective noise insulation. These structures often cost less than half as much to heat and cool as traditional homes built with dimensional lumber and fiberglass insulation. Loss of conditioned air through the insulation is only 7% compared to fiberglass insulation. This also means that HVAC systems can be sized smaller and prevents the need to extend ductwork to exterior walls, both offering savings.
- Use of sustainable materials contributes to a lower carbon footprint and lower cost to the environment.
- Usually less wood is used in a timber frame than in a stick built structure, and timbers can always been recycled at the end of the building’s life, sometimes centuries down the road.
- The building process creates almost no waste. Any waste created at the Cabin Creek Beamery is used for fuel to heat the Beamery in the wintertime, carbon-neutral, and there is little to no job site waste when the frame is raised.
Kitchens
- Place the kitchen near the dining room; you should not have to go through another room to get to the dining room from the kitchen.
- Place the kitchen near a service door to the outside of the house for less hassle when bringing in groceries.
- Use a durable, weather-resistant floor that goes all the way to the outside door.
- Position the Big 3–the sink, stove and refrigerator–so that their center fronts form the corners of a work triangle. Each leg of the triangle should be at least 4’ but no more than 9’. The sum of the three legs should be between 13’ and 26’. The triangle should be all open space.
- The dishwasher and the refrigerator doors should not be placed where they would open into any entry into your kitchen.
- The dishwasher should always be placed near the sink.
Typical Standard Appliance Sizes:
- Standard, single door refrigerators: 32″ – 34″ wide, allow 36″ of space.
- Double door refrigerators take up more space. Check the actual size recommendations in the manufacturers manual.
- Dishwashers: 24″ wide.
- Range/Oven: 30″ wide. Newer professional grade range/ovens can be 48″. Check with your product manufacturer.
- Standard double sinks: 32″ wide.
Typical Standard Cabinets and Countertops Sizes:
- Base cabinets (including tops): 36″ tall and 25″ deep
- Upper cabinets: 12″ deep, placed 15 to 18″ above the base cabinets.
- There should be at least 24″ of counter top on one side of the sink and 18″ on the other. This not absolute, but we do not recommend using less.
- There should be at least 15″ of countertop on the latch side of the refrigerator. Once again this is not an absolute but a strong recommendation.
- There should be at least 15″ on one side of the stove top and at least 9″ on the other. Once again this is a strong recommendation. Kitchens are expensive to refit.
The Shape of Kitchens
- “U” is the most efficient.
- “L” works well for an eat-in kitchen.
- Galley or corridor works well in smaller houses and apartments.
- General kitchen spacing: You need at least 36″ of space between cabinets/appliances and other cabinets/appliances or islands; 42″-48″ separation is strongly recommended, though. This becomes a crucial measurement when trying to incorporate an island. Islands take a significant amount of room and should not be squeezed in.
Dining Rooms
- Allow 42” from the edge of the table to the wall so that there is ample room. For example, a 3′ x 5′ table needs 10′ x 12′ space.
- Allow 30 square feet per person. For example, 6 people x 30′ = 180 square feet or a room 12′ x 15′.
Family Rooms
- Place the family room near the kitchen, often open to the kitchen.
- The family room is usually in the rear of the house, which offers more privacy and it is usually not visible from the front door.
- A small family room is around 12’x16’ while the average is 14’x18’.
Living Rooms
- The living room is usually located at the front of the house, often opposite the dining room.
- Typically has at least one long wall for placing a sofa and for hanging formal pictures.
- Minimum size is 12’x16’; average size is 12’ to 14’ wide by 16’ to 18’ long.
Foyers or Entry Areas
- Minimum size is 6’x6’; 6’x8’ or larger is better.
- You can create the illusion of separate space by employing a “wing wall” or a different type or style of flooring.
Bedrooms
- Plan for at least one long wall against which to place the head of the bed.
- Closets traditionally are placed toward other rooms to help with noise reduction or they can be placed on an outside wall to help with insulation. Once again, SIPs panels can help to negate the insulation factor.
Closets
- Closets are typically 25” deep. Your drywall specialist is able to split a 4’ wide section with a minimum amount of fuss.
- Bedroom closets usually range from 4’ to 8’ wide.
- Walk-in closets provide more free space than wall closets. Walk-in closets are usually “U” or “L” shaped.
- The new closet “systems” provide much better functional use of closet space.
Hallways
- Hallways should always be at least 3’; 4’ is ideal.
- Book shelves can easily be placed on one or both sides of a hallway. This allows not only for functional use of the hallway but also gives collectors much needed display space. Keep in mind that the hall should be made wider if you plan to use this feature.
Baths
- The smallest three-fixture bath is 5’x8’.
- The smallest two-fixture bath is either 3’x7’ or 5’x6’.
- The minimum suggested door size is 32”. You can go with a smaller 24” door, but a wider door span will allow more flexibility in the event of a wheelchair, for example.
- Standard tubs are 60”x32” wide; 6’ tall with shower surround.
- Standard showers are 36″ x 36″ or 48″ x 36″, 6′ tall; minimum sized shower is 32″ x 32”, but this is unusual.
- Standard toilet sizes are typically 28″ deep by 20″ wide and need 24″ in clearance in front of and 12″ on each side.
- Bathroom vanities are usually 31″ tall by 18″-22″ deep, including the countertop). A double bowl vanity should be a minimum of 5′ wide, single bowl vanities should be at least 18″ wide, though 2′ is a more realistic minimum. Sinks need at 30″ clearance in front.
- Bathroom plumbing is most cost efficient when placed back-to-back and stacked floor-to-floor in relation to other bathrooms in the house.
Sun
- Rooms that appreciate morning sun, such as kitchens and the bedrooms of early risers, should face east. Rooms that you don’t want to heat too quickly should also face east, as in the case of most kitchens.
- The north side of the house is always colder than the other sides, so consider carefully which rooms will be facing north.
Spans
The spans that you create in your timber frame are only limited by the size of timbers you can find, but we recommend that you don’t exceed a span of 32’. Timbers that are longer than 32’ are difficult to find and consequently more expensive.
Roof Lines and Roofs
- In general, the steeper the roof’s pitch, the better the house looks. Attractive pitches you can aim for include 6/12, 9/12, and 12/12. Consider that 12/12 roofs are hard to work on, but can offer you more square footage beneath, if desired. If you prefer a less steeply pitched roof, the knee wall can be made taller to add more room to a second story or loft area.
- If your house has multiple roof lines, try to keep them at the same pitch.
- When considering your roofing materials, keep in mind that what looks best, including shakes and metal, also cost more. The cost of labor for installing shakes or metal roofs is also significantly higher.
- Make sure that you install shingles or metal roofing that has been certified for application to SIPs. Most building departments require that you have written documentation from the manufacturer on the certification. Cost should not be used as an indicator that the shingles or metal roofing meet these higher standards. Shingles that are not certified for direct application to SIPs can bubble or wave up.
Stairs
- Contact your local building department for detailed information on the regulations for stairs.
- Stairs that are 4’ wide offer good benefits in the long term. For example, if you need to help someone up the stairs, it is easier to walk beside them when there is more room available.
Structural Engineering
Always check with the building department in your area regarding structural engineering. Some locations require that timber frame plans be stamped by a structural engineer before construction can take place.
Important Links
- Timber Framing
- Building Designers & Architects
- Lending Institutions
- Land for Sale
- Publications
- Wood Finishes
- Stress Skin Panels
- Other Links
- Timber Frame Business Council – www.timberframe.org
- Timber Framers Guild – www.tfguild.org
- Cad Works – www.cadworks.com
- Franklin Area Chamber of Commerce – www.franklin-chamber.com
- Timber Products Inspection, Inc.
1641 Sigman Rd.
Conyers, Georgia 30012 - NAHBA, National Association of Home Builders – www.nahb.com
- Macon County Home Builders Association – www.mchba.net
- Ritter Architecture, AIA – www.ritterarchitecture.com
- Grant & Grant Design Group – www.billgrant-designer.com
- Macon Bank – www.maconbank.com
- Rabun County Bank – www.rabuncountybank.com
- Acreage available in Henderson County, NC – (828) 697-4203
- Highlands Pass – www.highlandspass.com
- Timber Framing, Journal of the Timber Framers Guild – www.tfguild.org
- Timber Homes Illustrated – www.timberhomesillustrated.com
- Timber Frame Homes – www.timberframehomes.com
- Log and Timber Frame Style – www.logandtimberstyle.com
- Watco Danish Oil & Watco Teak Oil – www.rustoleum.com / Ace Hardware
- Minwax Danish Oil – www.minwax.com
- Minwax Teak Oil – www.minwax.com/products/specialty_products/teak_oil.html
- Sure-tight Panel Co. – www.suretight.com
- MURUS Structural Insulating Panels – www.murus.com
- General Panel Corp. – www.sipsproducts.com
- Thermocore – www.thermocore.com
- Camp Arrowhead for Boys in Tuxedo, North Carolina – www.camparrowhead.org/
- Camp Glen Arden for Girls in Tuxedo, North Carolina – www.campglenarden.com